XE 폼 작성
사용자에게 이름을 물어 입력하게 한 다음 환영 인사를 보여 주는 페이지를 나타내는, 아주 간단한 폼을 만들어 보겠습니다. 모듈에는 하나의 뷰만 있습니다. 이 뷰는 사용자가 이름을 입력한 후 hello 메시지를 표시하거나 이름을 입력하는 폼을 다시 출력합니다.
이 예제 모듈의 완성된 버전은 hello.zip 에서 다운로드할 수 있습니다. 이 절에서 설명할 튜토리얼을 따라 하면서 직접 모듈을 완성하려면 시작 파일( hello-tutorial.zip )만 다운로드하십시오.
먼저 입력 상자와 등록 버튼만 있는 폼 형태를 만들어 보겠습니다. 파일 이름(name.html)을 정한 후 ./modules/hello/tpl/에 저장합니다.
<h1>Enter your name:</h1>
<form id="name_form" action="./" method="post" ruleset="say_hello">
<input type="hidden" name="module" value="hello" />
<input type="hidden" name="act" value="procHelloGreet" />
<input type="text" name="name" id="name" value="" />
<br />
<input type="submit" value="OK" />
</form>
XE에서 폼을 전송하려면 기본적으로 어떤 모듈의 어떤 액션으로 데이터를 전송할 지 추가하고, 데이터 유효성 검사를 위해 룰셋을 지정하여야 합니다. 위의 예제에서는 hello 모듈의 procHelloGreet 액션에 데이터를 전송하도록 하고, say_hello라는 룰셋 파일로 유효성 검사를 하도록 설정했습니다.
|
|
참고 form 태그의 ruleset 속성은 적용할 룰셋 파일의 파일 이름입니다. 해당 속성값 앞에 @를 붙이면 XE에서 동적으로 생성되는 룰셋을 참고하라는 뜻이 됩니다. 예를 들어, XE 1.5에서는 로그인 계정으로 user_id 또는 email_address를 선택하도록 되어 있습니다. 이때 설정값에 따라 로그인 데이터 유효성 검사 방식이 달라져야 하므로 동적 룰셋을 적용합니다. 동적 룰셋 파일은 files/ruleset에 저장됩니다. |
템플릿 파일을 출력하는 뷰 메서드를 생성합니다. ./modules/hello/hello.view.php에 다음의 메서드를 추가합니다.
/**
* @brief Display form for entering a name
**/
function dispHelloName() {
$this->setTemplateFile('name');
}
./modules/hello/conf/module.xml에 다음과 같이 추가해서 최종 사용자가 사용할 수 있게 합니다.
<?xml version="1.0" encoding="utf-8"?>
<module>
<grants />
<permissions />
<actions>
<action name="dispHelloName" type="view" standalone="true" index="true" />
</actions>
</module>
이제 /?module=hello로 접근하면 다음과 같은 폼을 확인할 수 있습니다.

아직 우리가 만든 폼은 아무 기능도 하지 않습니다. 이 폼에 사용자 이름을 조회하고 hello 메시지를 출력하는 메서드를 추가해 보겠습니다.
./modules/hello/hello.controller.php에 다음과 같은 메서드를 추가합니다. 룰셋 파일을 사용할 때는 액션 실행 후 이동할 액션을 명시해야 합니다. procHelloGreet 함수의 실행이 완료되면 dispHelloName 화면으로 이동하도록 아래와 같이 setRedirectUrl을 설정합니다.
/**
* Action for handling the name input form submission
* Retrieves the name given by the user and passes it on for displaying the greeting screen
*/
function procHelloGreet(){
$name = Context::get('name');
$this->setRedirectUrl(getNotEncodedUrl('', 'module', 'hello', 'act', 'dispHelloName', 'name', $name));
}
./modules/hello/conf/module.xml의 <actions> 요소에 다음과 같이 추가합니다.
<action name="procHelloGreet" type="controller" standalone="true" />
폼 내용의 유효성을 검사하려면 XML 룰셋 파일을 추가해야 합니다. 파일 이름을 say_hello.xml로 짓고 ./modules/hello/ruleset/ 아래에 저장합니다.
<?xml version="1.0" encoding="utf-8"?>
<ruleset version="1.5.0">
<fields>
<field name="name" required="true" />
</fields>
</ruleset>
룰셋 파일에 사용되는 요소와 속성에 대한 자세한 설명은 " 2.1.5 룰셋 사용 "을 참조하십시오.
./modules/hello/hello.view.php에 있는 dispHelloName 메서드를 다음과 같이 수정합니다.
/**
* @brief Display form for entering a name
**/
function dispHelloName() {
$name = Context::get('name');
if(isset($name)){
$hello_message = "Hello " . $name;
Context::set('hello_message', $hello_message);
}
$this->setTemplateFile('name');
}
템플릿 파일(./modules/hello/tpl/name.html)도 다음과 같이 수정합니다.
<h1 cond="isset($hello_message)">{$hello_message}</h1>
<block cond="!isset($hello_message)">
<h1>Enter your name:</h1>
<form id="name_form" action="./" method="post" ruleset="say_hello">
<input type="hidden" name="module" value="hello" />
<input type="hidden" name="act" value="procHelloGreet" />
<input type="text" name="name" id="name" value="" />
<br />
<input type="submit" value="OK" />
</form>
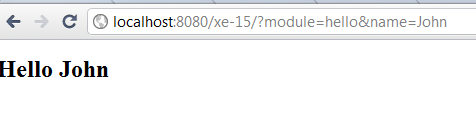
</block>브라우저에서 해당 페이지를 다시 로드하면 다음과 같은 인사 메시지를 볼 수 있습니다.
이제 폼이 완성되었습니다.